AWS AmazonLinuxへのZabbixインストール
AmazonLinuxへのZabbix5.0インストール
![]() とらくらのインフラエンジニア、たむです。
とらくらのインフラエンジニア、たむです。
監視システム検討時によく候補に出てくる「Zabbix」。
オープンソースの監視システム「Zabbix」は、Network機器やServer機器などを監視出来、カスタマイズすることで出来ることが広がります。そのZabbixをAWS上構築する場合、「AWS Marketplace」や「コミュニティ AMI」にAMIがありますので、そちらを利用することが手っ取り早いです。しかしながら、OSの種類、OSバージョン、Zabbixのバージョンなどの要件が合わないこともありますので、本記事では「Amazon Linux 2 AMI」を利用して作成したインスタンス上に、現時点で一番サポートが長い「Zabbix 5.0」を構築する手順を記載します。
設定項目
- OS設定
タイムゾーン設定
ホスト名設定 - PHPインストール
PHP7.2インストール有効化
PHP7.2インストール - DBインストール
mariaDBインストール
mariadb初期設定 - Webアプリケーションインストール
Apacheインストール - Zabbixインストール
Zabbix5.0インストール
Zabbix初期設定
OS設定
- EC2インスタンスのAmazonLinuxをデプロイし、接続します
- rootユーザーにスイッチします
- 以下のコマンドよりタイムゾーンを設定します
timedatectl set-timezone Asia/Tokyo - 以下のコマンドよりホスト名を設定します
hostnamectl set-hostname [ホスト名] - 以下のコマンドで再起動します
shutdown -r now
PHPインストール
AmazonLinuxでは「Extras Library」で有効にしない限り、PHPのバージョンは5.4 (2021年11月現在) がインストールされてしまいますので、以下の手順にて7.2のバージョンをインストールしてください。
- 以下のコマンドで「Extras Library」のPHP7.2を有効化し「enabled」になることを確認します
amazon-linux-extras enable php7.2 - 以下のコマンドよりPHPをインストールします
yum install php
mariaDBインストールおよび初期設定
- 以下のコマンドよりmariadbをインストールします
yum install mariadb mariadb-server - 以下のコマンドよりServer起動時の自動起動を設定します
systemctl enable mariadb - 以下のコマンドを実行し、mariaDBを起動します
systemctl start mariadb - 以下のコマンドで初期設定します
mysql_secure_installation以下、実行内容で対話モードでの入力となります
NOTE: RUNNING ALL PARTS OF THIS SCRIPT IS RECOMMENDED FOR ALL MariaDB
SERVERS IN PRODUCTION USE! PLEASE READ EACH STEP CAREFULLY!

In order to log into MariaDB to secure it, we'll need the current
password for the root user. If you've just installed MariaDB, and
you haven't set the root password yet, the password will be blank,
so you should just press enter here.

Enter current password for root (enter for none): [root(DB上)のパスワードを設定するためEnter]
OK, successfully used password, moving on...

Setting the root password ensures that nobody can log into the MariaDB
root user without the proper authorisation.

Set root password? [Y/n]
New password: [root(DB上)のパスワードを設定]
Re-enter new password: [再度パスワードの入力]
Password updated successfully!
Reloading privilege tables..
... Success!


By default, a MariaDB installation has an anonymous user, allowing anyone
to log into MariaDB without having to have a user account created for
them. This is intended only for testing, and to make the installation
go a bit smoother. You should remove them before moving into a
production environment.

Remove anonymous users? [Y/n] [匿名ユーザーを削除するためEnter]
... Success!

Normally, root should only be allowed to connect from 'localhost'. This
ensures that someone cannot guess at the root password from the network.

Disallow root login remotely? [Y/n] [root(DB上)のリモートログインを禁止するためEnter]
... Success!

By default, MariaDB comes with a database named 'test' that anyone can
access. This is also intended only for testing, and should be removed
before moving into a production environment.

Remove test database and access to it? [Y/n] [testデータベースを消すためEnter]
- Dropping test database...
... Success!
- Removing privileges on test database...
... Success!

Reloading the privilege tables will ensure that all changes made so far
will take effect immediately.

Reload privilege tables now? [Y/n] [設定を反映させるたのリロードをするためEnter]
... Success!

Cleaning up...

All done! If you've completed all of the above steps, your MariaDB
installation should now be secure.

Thanks for using MariaDB!
Apacheインストール
- 以下のコマンドよりApacheをインストールします
yum install httpd - 以下のコマンドよりServer起動時の自動起動を設定します
systemctl enable httpd - 以下のコマンドでApacheを起動します
systemctl start httpd
Zabbixインストールおよび初期設定
- 以下のコマンドよりZabbixのレポジトリをインストールします
rpm -Uvh https://repo.zabbix.com/zabbix/5.0/rhel/7/x86_64/zabbix-release-5.0-1.el7.noarch.rpm - zabbix-frontendレポジトリを有効化します
vi /etc/yum.repos.d/zabbix.repo『[zabbix-frontend]』項目の『enable』の数値を『0』より『1』に変更し、有効にします
[zabbix-frontend] ... enabled=1 ... - Software Collections(以下 SCL)のパッケージをインストールします
yum install http://mirror.centos.org/altarch/7/extras/aarch64/Packages/centos-release-scl-rh-2-3.el7.centos.noarch.rpm yum install http://mirror.centos.org/centos/7/extras/x86_64/Packages/centos-release-scl-2-3.el7.centos.noarch.rpm - 以下のコマンドよりZabbix ServerおよびクライアントとZabbix設定関連パッケージをインストールします
yum install zabbix-server-mysql zabbix-agent zabbix-web-japanese.noarch zabbix-web-mysql-scl zabbix-apache-conf-scl - 以下のコマンドよりmariaDBに接続し、zabbix用のデータベースとユーザーを作成します
以下のコマンド実行後にDB初期設定で設定したrootのパスワードが求められますので入力しますmysql -uroot -p以下のコマンドを実行し、データベースとユーザーを作成します
create database zabbix character set utf8 collate utf8_bin; create user zabbix@localhost identified by '[zabbixユーザー(DB上)の設定したいパスワードを入力]'; grant all privileges on zabbix.* to zabbix@localhost; quit; - 作成したデータベースにZabbixの初期スキーマとデータをインポートします
以下のコマンド実行後に上記で設定したzabbixユーザーのパスワードが求められますので入力しますzcat /usr/share/doc/zabbix-server-mysql*/create.sql.gz | mysql -uzabbix -p zabbix - php-fpmのタイムゾーンを設定します
vi /etc/opt/rh/rh-php72/php-fpm.d/zabbix.conf『php_value[date.timezone]』項目を『Europe/Riga』より『Asia/Tokyo』へ変更します
php_value[date.timezone] = Asia/Tokyo - Zabbix ServerのConfigに上記で作成したデータベース名およびユーザー名とパスワードを設定します
vi /etc/zabbix/zabbix_server.conf上記で設定したデータベース名やユーザー名とパスワードを設定します
... DBName=zabbix ... DBUser=zabbix ... DBPassword=[zabbixユーザー(DB上)のパスワードを入力] ... - 以下のコマンドよりServer起動時の自動起動を設定します
systemctl enable zabbix-server zabbix-agent rh-php72-php-fpm - 以下のコマンドより各サービスの起動または再起動します
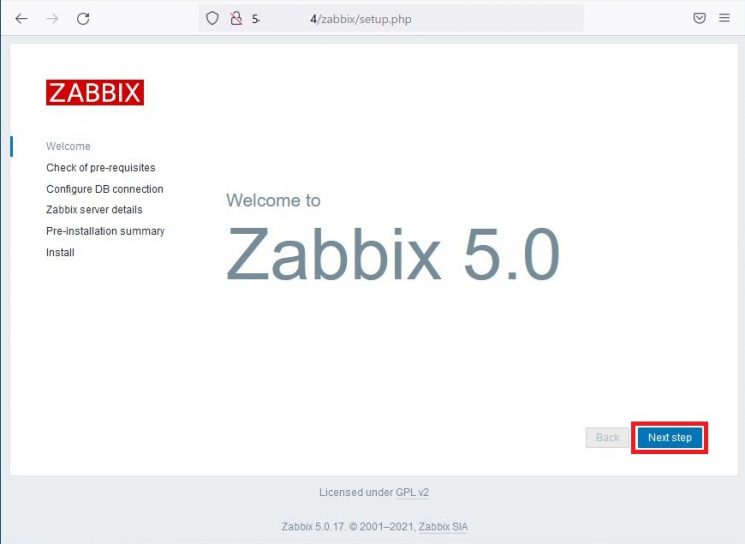
(Server再起動でも可能)systemctl restart zabbix-server zabbix-agent rh-php72-php-fpm httpd - Webブラウザで『http://[Zabbix ServerのIP]/zabbix/』を入力しアクセスすると「Welcome」画面が表示されるので『Next step』をクリックします
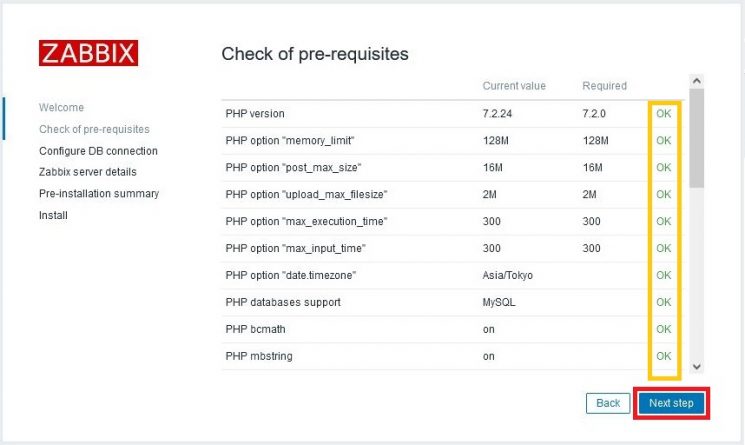
- 「Check of pre-requisites」画面で各必須項目が『OK』となっていることを確認し『Next step』をクリックします
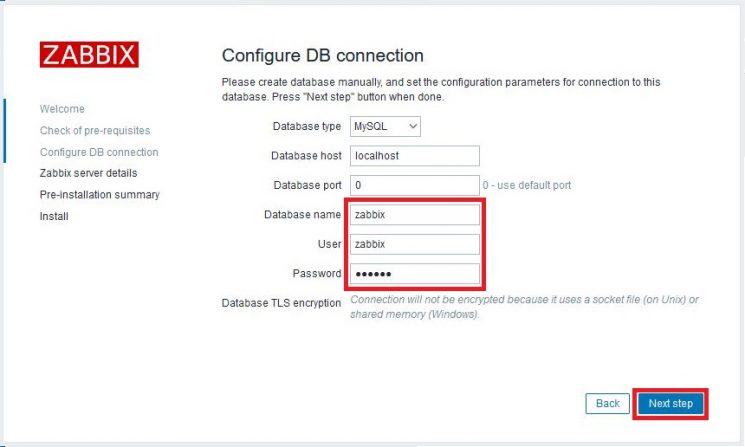
- 「Configure DB connection」画面で、上記データベース設定で設定したデータベース名『Database name』、ユーザー名『User』、パスワード『Password』を入力し『Next step』をクリックします
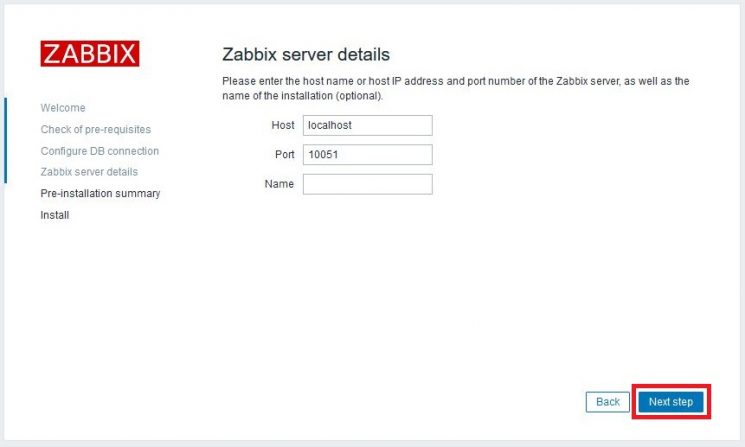
- 「Zabbix server details」画面で『Next step』をクリックします
- 「Pre-installation summary」画面で内容を確認し『Next step』をクリックします

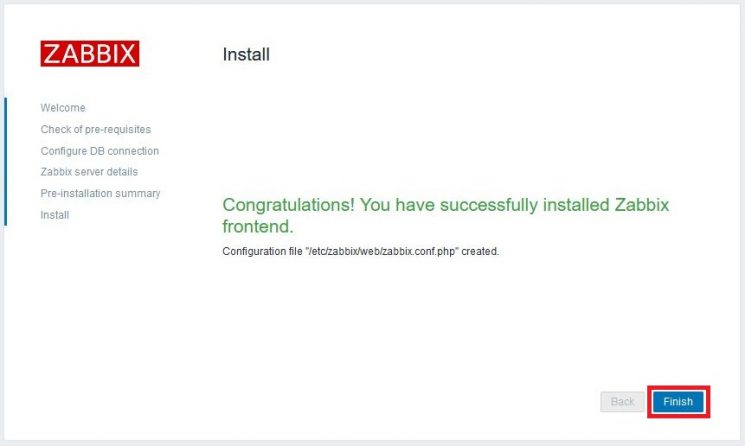
- 「Install」画面で『~ successfully ~』と表示されることを確認し『Next step』をクリックし、初期設定を終了します
以上でZabbixが使用可能となり、以下がダッシュボード画面となります。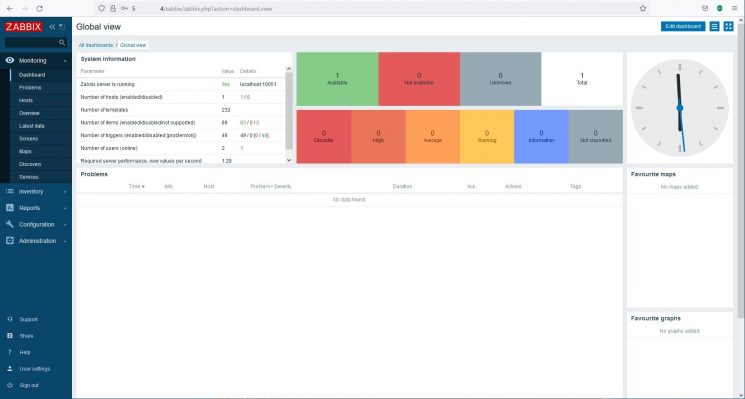
次回
次回は、ZabbixでのCloudWatchメトリックス監視の設定を記載します。
参考サイト
Zabbix Download and Install Zabbix
https://www.zabbix.com/jp/download?zabbix=5.0&os_distribution=centos&os_version=7&db=mysql&ws=apache
最短でAWSを習得したい方におすすめ!
オンラインスクール「とらくら」
当ブログを運営しているオンラインスクール「とらくら」では、無料説明会を開催しております。
講座内容や料金、本講座を受講するメリット・デメリットについてはもちろん、業界に精通しているからこそできるエンジニアのキャリアプランや業界の情勢などを、ざっくばらんにお話します。
些細なことでも、お気軽にご相談ください。


投稿者プロフィール

-
<インフラエンジニア>
■ こんにちは!こんばんわ!「たむ」と申します。製造業からITへ転職し、インフラ、主にサーバ関連をやってきました。IT関連の学校を卒業していませんが、なんとか、サーバ技術者やってます。あっはぃ・・・
最新の投稿
 AWS2022年2月2日Zabbix5でCloudWatch監視設定(AWS RDS)
 Backlog2021年12月20日Backlogの更新をSlackで通知する設定を入れてみた
- AWS2021年12月3日Zabbix5でAWSステータス監視設定
- AWS2021年11月30日Zabbix5でCloudWatch監視設定(EC2インスタンス)